![]()

| Recent Comments |
| Categories |
| Archives |
| Tags |
Once in a lifetime
Date: October 2023
Style: Symphonic Blues/Jazz/Orchestral
Label: Skippy Music
ISRC: NL7PC2200004
Producer: Antoine van Kampen (AvK)
Spotify: [here]

Lyrics, Composition and Arrangement
Composition and Lyrics: Daphne Reijnoudt
Arrangement and orchestral composition: Antoine van Kampen
Performance
Vocals: Daphne Reijnoudt
Piano/Hammond (intro, verse, chorus, and outro): Antoine van Kampen
Piano/Hammond (solo): Abramo Riti [YouTube] [Facebook] [Fiverr]
Guitar (verse, chorus): Karel Bravenboer
Guitar (during solo and riffs): Bas van Kampen


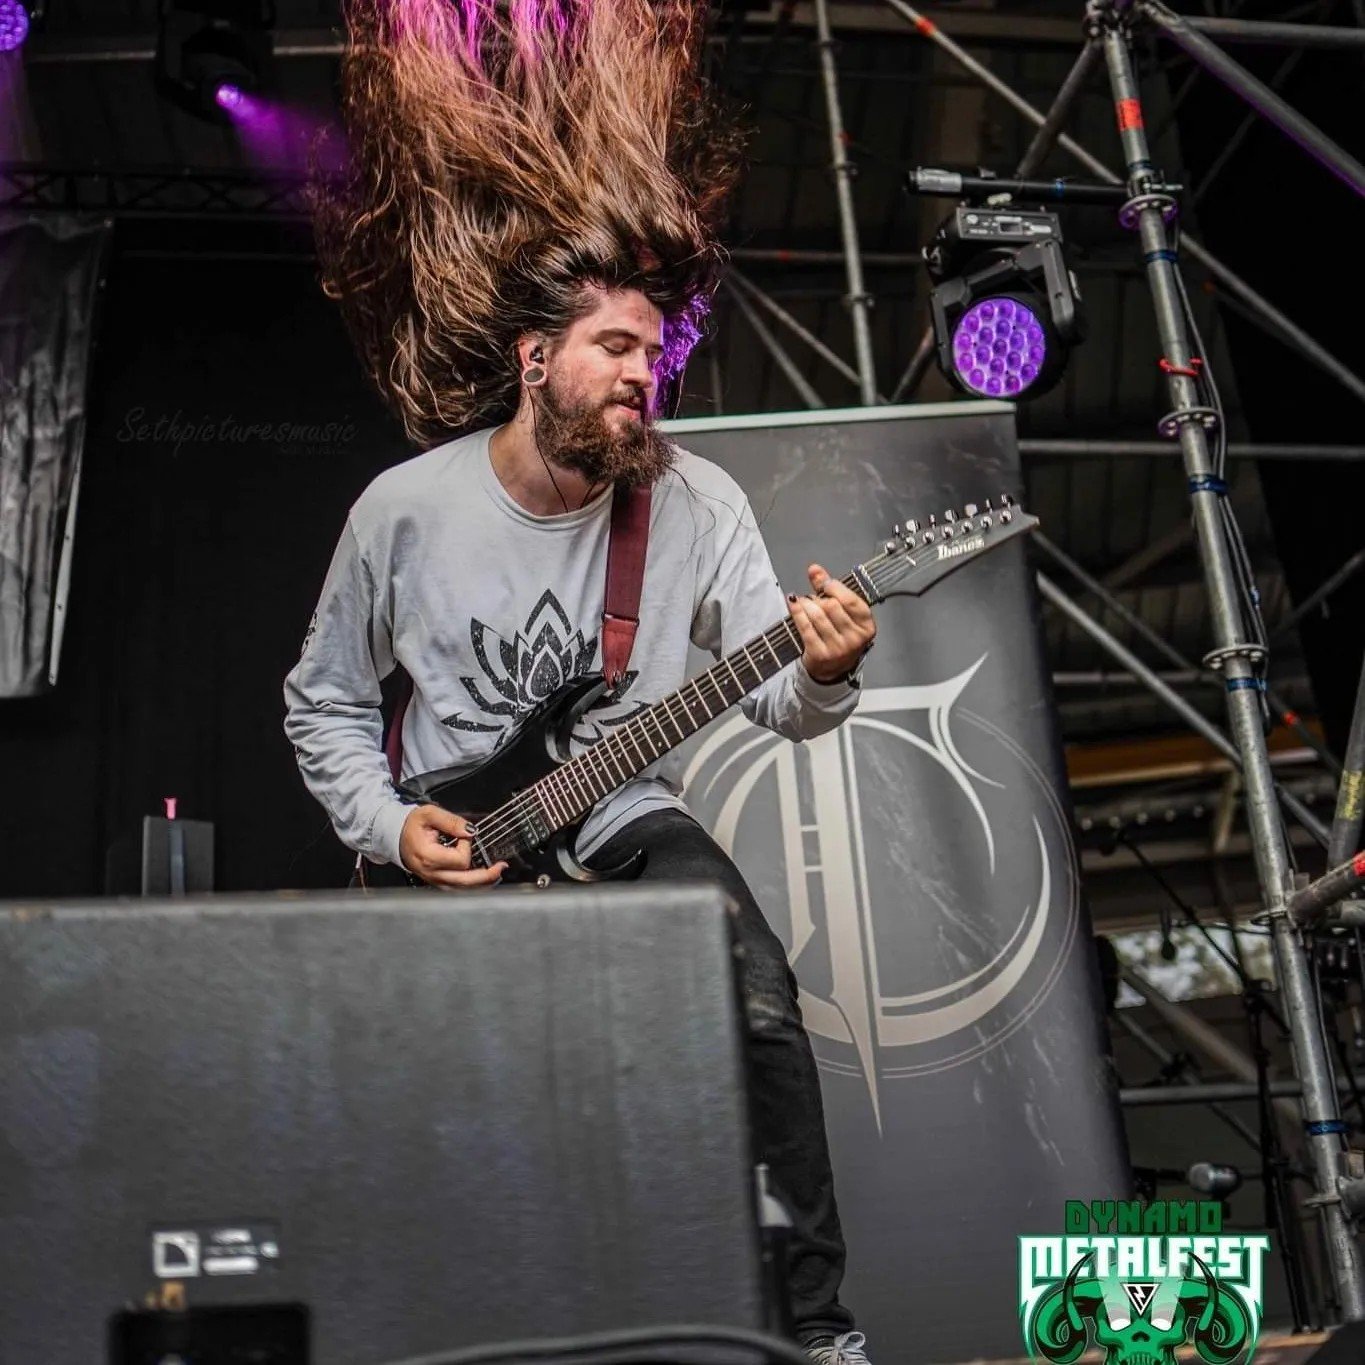

Meet the band. From left to right: Karel Bravenboer, Daphne Reijnoudt, Abramo Riti, Bas van Kampen, Antoine van Kampen
Summary of the production
Vocals
The vocals of Daphne Reijnoudt were recorded at Skippy Studio using the sE2200a MkII (large membrane condenser) through a Neve pre-amp clone (Golden Age Premier Pre-73). DR was provided with a headphone mix (BeyerDynamic DT880 PRO).
Piano and Hammond
Antoine van Kampen played the piano on the Native Instruments Komplete Kontrol S88 keyboard using the Spitfire Audio BBCSO piano (Steinway Model D grand; VSTi). He play the Hammond XK5 for the song intro and outro. Recorded at Skippy Studio. The piano part was edited in the Dorico 5 music notation program to improve timings and to fit the orchestral part.
Solo Piano and Hammond
Abrama Riti played the Hammond A100 with Leslie cabinet 760 and piano for the solo part. Recording in his own studio. The Hammond was captured using 2 microphones for the Leslie amp horns and 2 mics for the bass rotor. He used two MD441U and two MD421 Sennheiser microphones, a AMPS Neve 1073DPX Preamp, and the Warm Audio WA273-EQ Dual-Channel British Mic Preamplifier. Everything was recorded through a RME Fireface 802 audio interface. The piano is the Noire from Native Instruments.
Guitars
The strum guitar played by Karel Bravenboer recorded at Skippy Studio and played through the Laney IRT60H Ironheart / Harley Benton G112. However, I recorded three signals:
- DI using the Behringer DI800 (clean signal)
- DI on the Laney amplifier (signal taken after the amplifier; and includes any effect that is used)
- The Shure SM57 dynamic microphone (off-center); Connected to the Golden Age Premier Pre-73 microphone pre-amp.
For the verses, a clean guitar was recorded. I used to microphone recording in the mix. For the two choruses a distorted guitar was recorded using the Barber LTD Black overdrive. During mixing it turned out that the distorted guitar didn’t glue into the mix and, therefore, I used the clean DI800 signal that I processed using FabFilter Saturn 2 to add a very slight distortion.
The strum guitar and the guitar riffs played by Bas van Kampen, were recorded at Skippy Studio and play directly through the Golden Age Premier Pre-73 pre-amp (DI Input), and further processed in Cubase.


Image. Getting ready for the vocal and guitar recording. The Laney guitar amp is mic’d up with the Shure SM57. The speaker and microphone are shielded by three acoustic panels to prevent too much room ambience.
Drums and Bass
The drums and bass were composed with Toontrack’s Superior Drummer 3 and EZbass respectively. Both are Virtual Instruments (VSTi). I used the Broadway Basic preset from the Decades library for the drums. The individual drum parts (e.g., kick, snare) were exported as wav files from Superior Drummer into Cubase for further mixing. For the bass, I used the Pure Analog preset from the EZbass Vintage library. This was exported as MIDI to Cubase and converted to wav in Cubase when no further changes were required.
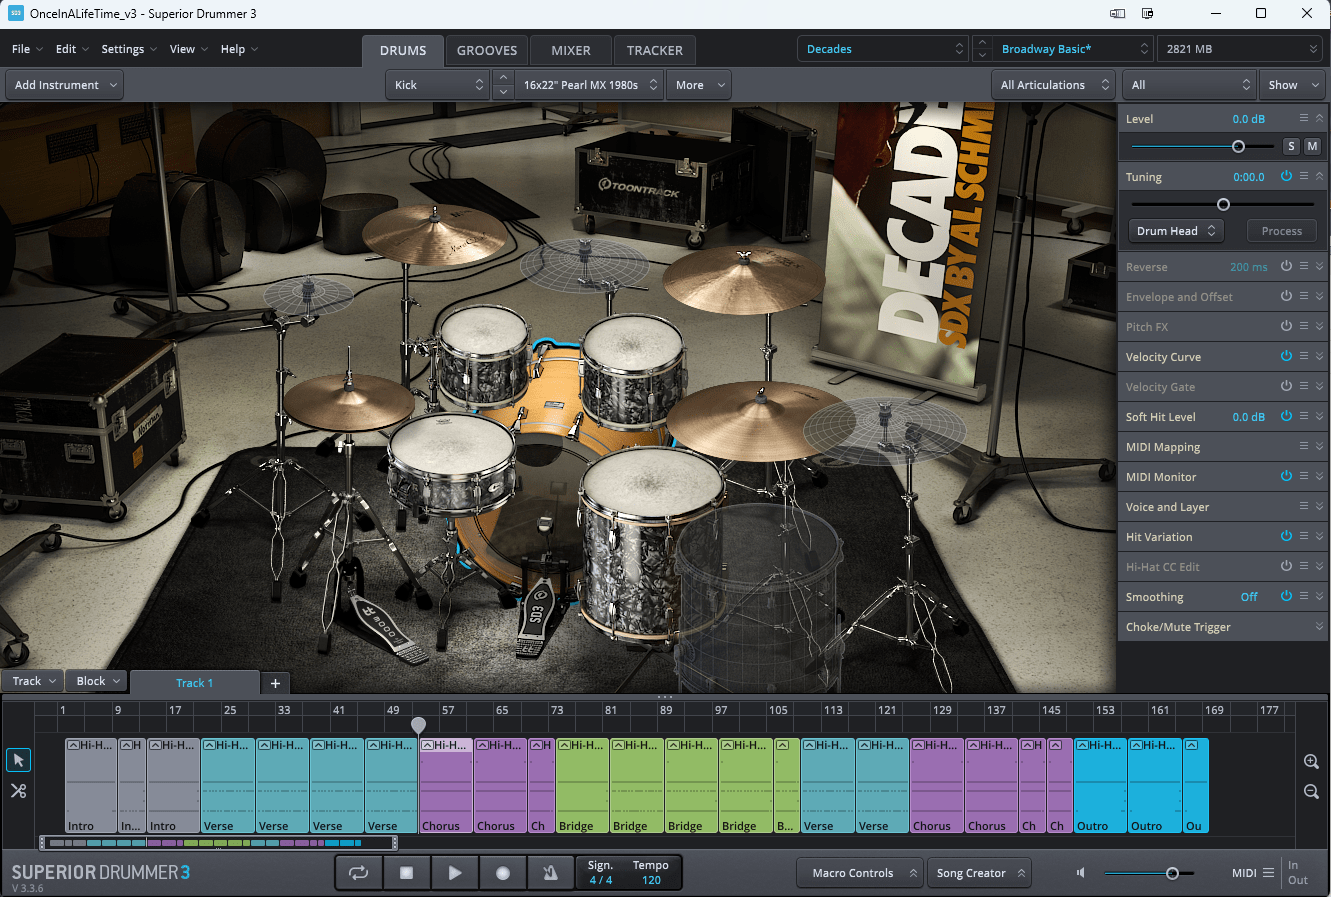
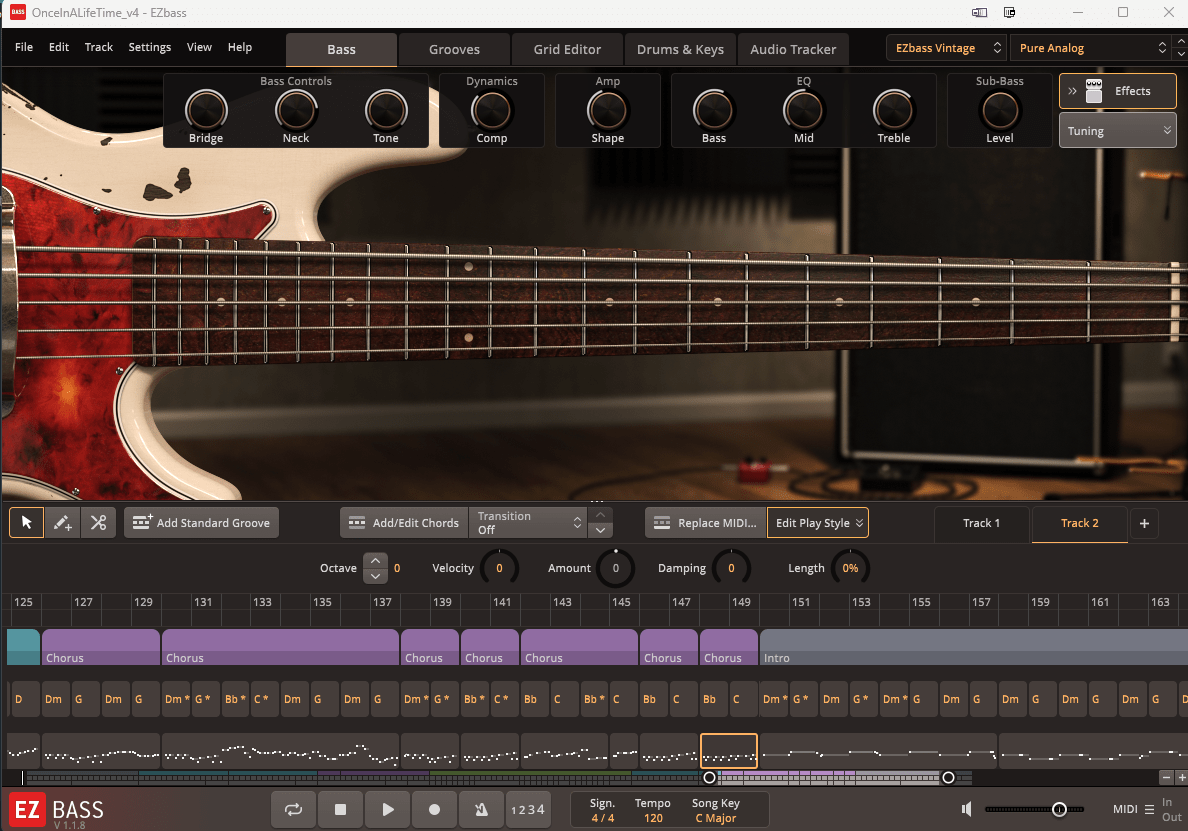
Image. Superior Drummer 3 and EZbass from Toontrack for the drum and bass parts respectively.
Orchestra
The orchestral part was composed in Dorico 5. I defined a 20 piece orchestra using the Spitfire audio BBCSO library. It included 2 flutes, oboe, Bb clarinet, bassoon, 4 F horns, 2 Bb trumpets, trombone, 4 violins, 2 viola, violoncello, and a contrabass. For part of the instrument I used different articulations (e.g., legatos and marcatos for the violins, and cuivré for the horns) throughout the composition. I kept the orchestral composition relatively straightforward in terms of harmonies to avoid clashes with other parts. Below you can find the composition.
The orchestral part posed me with two technical challenges that I describe in different posts:
Another thing I learned was the need for timing offsets for the various instruments so that samples actually play on the beat rather than lagging. I now fixed these offsets during mixing by nudging specific parts (audio clips) backward in time. Next time, I probably take a more systematic approach. See also [here]. It was a steep learning curve to determine how to use the different articulations in Dorico and how to use the CC1 (modulation) and CC11 (expression) controllers to fade between the dynamic layers of the samples and to control the volume respectively. I used the KORG nanoKontrol 2 for controlling CC1 and CC11. Once the composition was done, I exported it as MIDI from Dorico and imported it in Cubase.
Given the fact that I used this library for the first time and had many things to learn, the result is not that bad. However, the horn section didn’t sound as powerful as I wanted (I will probably do better next time), and I have to study the balancing the levels of the instruments in a real orchestra.
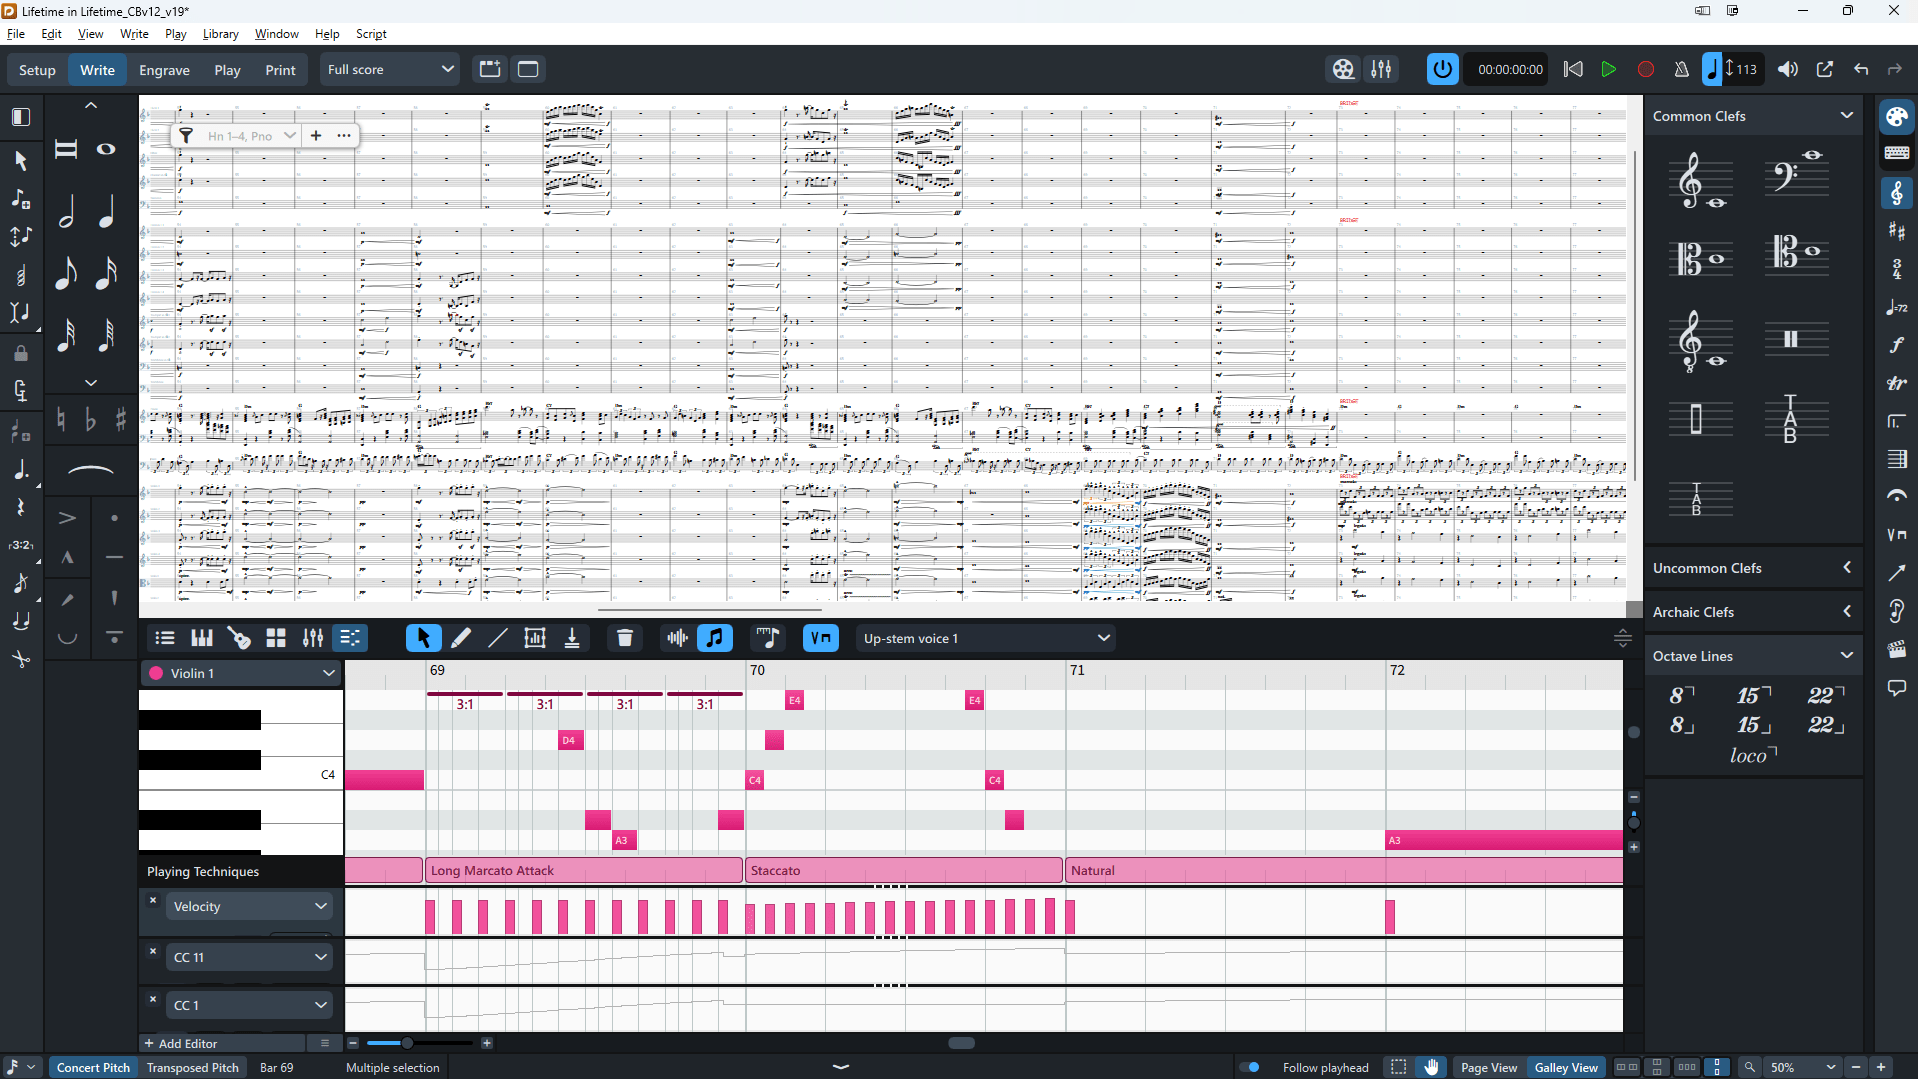

Image. Dorico 5. Left: part of the composition in Dorico 5 in the upper panel. The lower panel shows the piano roll, the note velocity, and controllers CC1 and CC11. Right: list of instruments from the Spitfire BBCSO library. Shown is the Oboe with the ‘long’ articulation.
Below you can hear the Dorico 5 version using the Spitfire BBCSO library with the ‘mix1’ microphone positions. Mix1 is Jake Jackson’s mix, which is a balance of commonly used microphone positions: Decca Tree, Outriggers, Ambient, Balcony, Mids (not on the Strings), and Close signals. In the Cubase version, for mixing, I used the Close wide microphones but some reverb added using a reverb plugin.
Orchestral part (Dorico version; with ambience)
Orchestral part (Cubase version; without ambience)
Mixing and Mastering
I did the mixing in Cubase Pro 12 and made a master in WaveLab Pro 11.1. Both were done using the VSX headphone mixing system. Since it is very difficult to make a master from your own mix and because dedicated mastering studios do just a better job and provide a second pair of ears, a second master was made by Laurens van Oers from Obsidian Mastering. He provided me with some very useful tips to make some final improvements to the mix before he started mastering.
A selection of mix aspects:
- For the vocal chain I used the SSL Channel strip 2, the UAD LA-2A compressor, the UAD Pultec EQP-1A, Fabfilter Pro Q3, and the Nectar 3 de-esser (see also [here]). On the vocal bus I used the SSL bus compressor. In addition, I used parallel compression (UAD 1176LN) and the used the Soundtoys microshift and the Waves CLA Epic Stereo reverb.
- In Cubase I used the same Spitfire BBCSO configuration and used the Close wide microphones to reduce ambiance/reverb to prevent a cluttered mix. Instead, I added reverb using a effects bus in Cubase. Although during the composing in Dorico I notated dynamics (e.g., crescendos, p, f), I still added volume automation during mixing once in the context of all other instruments.
- I have largely edited the strumming guitar by changing the timing of many notes to better align it with the other rhythm instruments. This was done in Melodyne Studio.
- The guitar riffs were recorded as a clean DI signal and put through the Fabfilter Pro G gate, and Amplitube 5 for re-amping. The riffs were recorded as a solo over one full verse and chorus which was during mixing chopped up in smaller riffs and placed throughout the song.
- I did very little processing on the orchestral instruments. Some instruments had little EQ and/or compression.
- The main mixing challenge was to give the many instruments a place in the mix. In particular, I had a hard time to give all guitars sufficient room in the mix without clashing with the very busy piano or the orchestral parts.
For the mastering I made in WaveLab, I proceeded as follows:
- Created audio montage for the song 44.1kHz/32bit floating point.
- Position the audio file to start at 200ms
- Added very short sigmoid fade in at the beginning, and little longer sigmoid fade out on the end
- Set top loudness range to -16 LUFS to have a reasonable input level for the audio processing
- Set CD markers (to assign song name)
- Define CD Text; Entries are automatically carried over to my meta-data template (e.g., ID3 v1/v2). Added additional metadata, and artwork
- Check audio for errors (clicks, etc)
- Audio processing (see below)
- Render to 32bit floating point, 44.1 kHz (this version has the audio processing locked in).
- From 32bfp render to 24bit 44.1kHz (dithered wav) and render to 320 kbps mp3 file containing the artwork.
- Checked rendered audio and metadata
Processing chain (see [here]:
- Vintage Tape (Ozone iZotope; frequency response and saturation)
- Unisum (Toonprojects; compression)
- bx digitial V3 (Brainworx; EQ)
- TDR Limiter 6 GE (Tokyo Dawn Records; limiting and clipping)

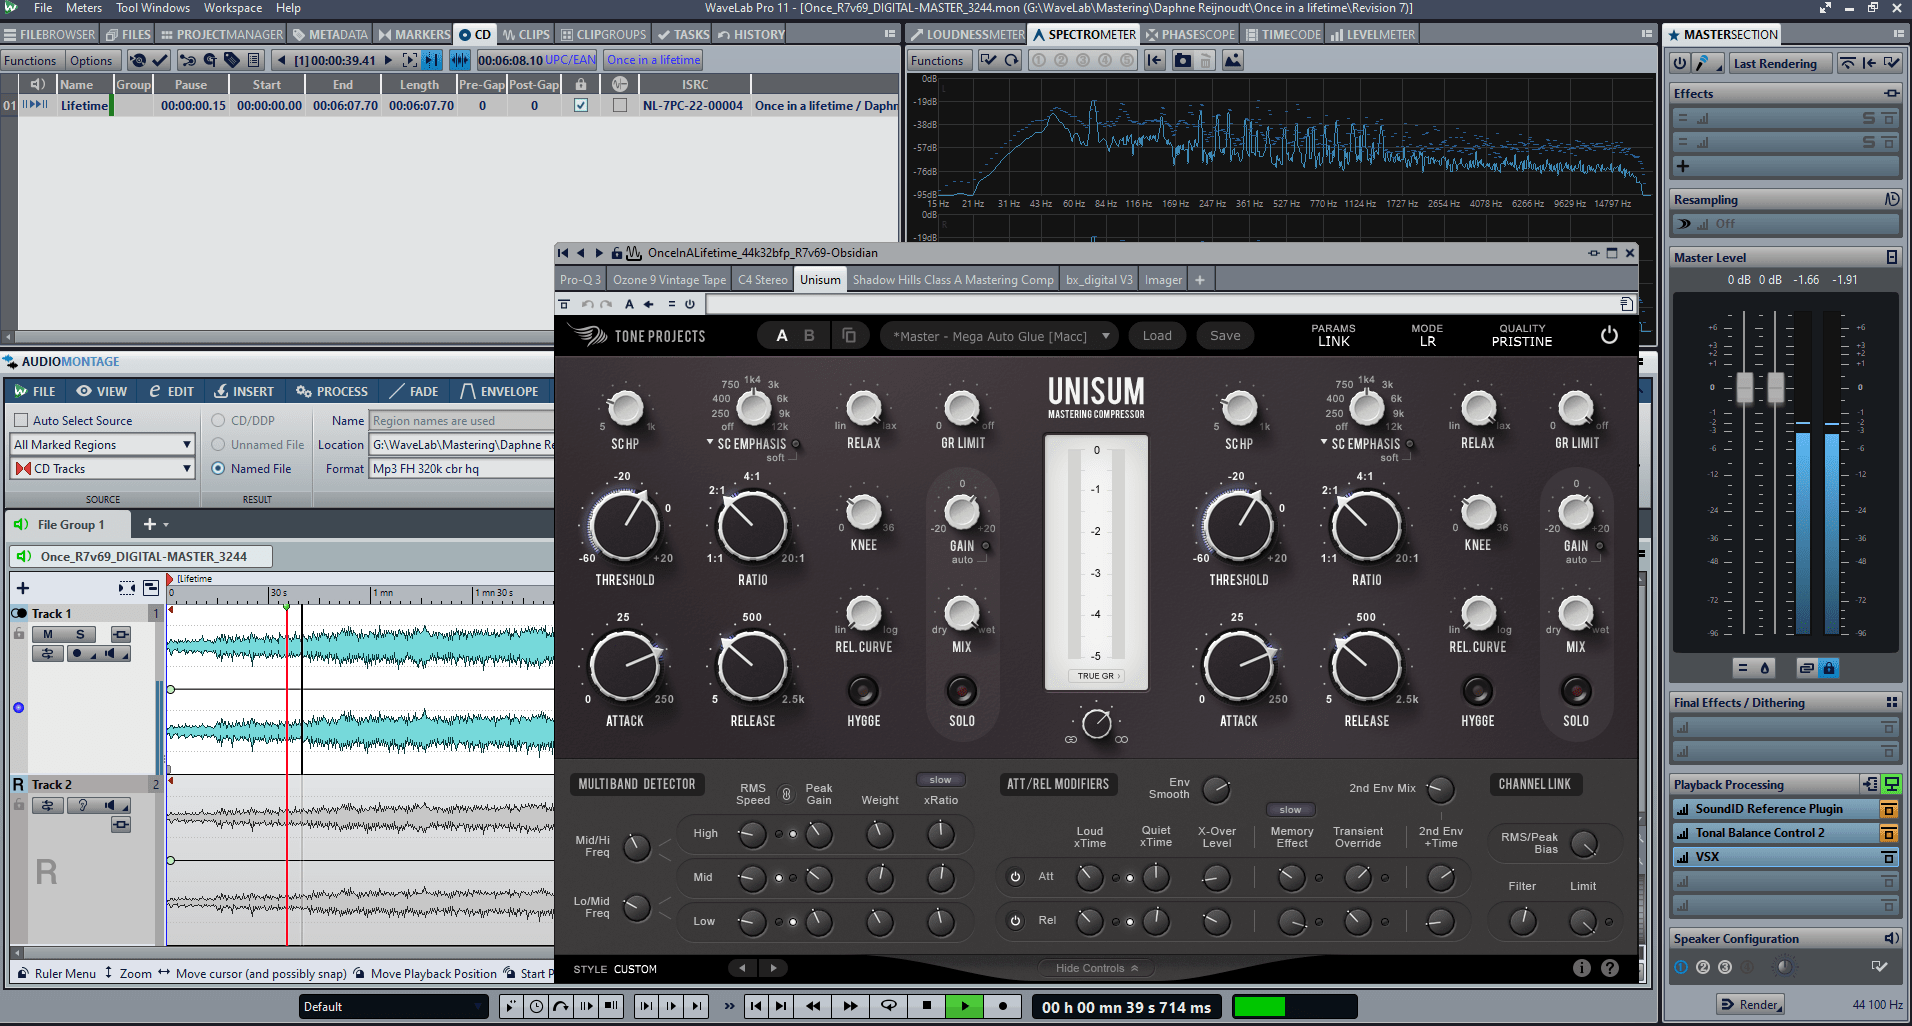
Image: Mix and master session (Skippy Studio). Left: Mix session in Cubase 12. Right: Mastering session in WaveLab 11.
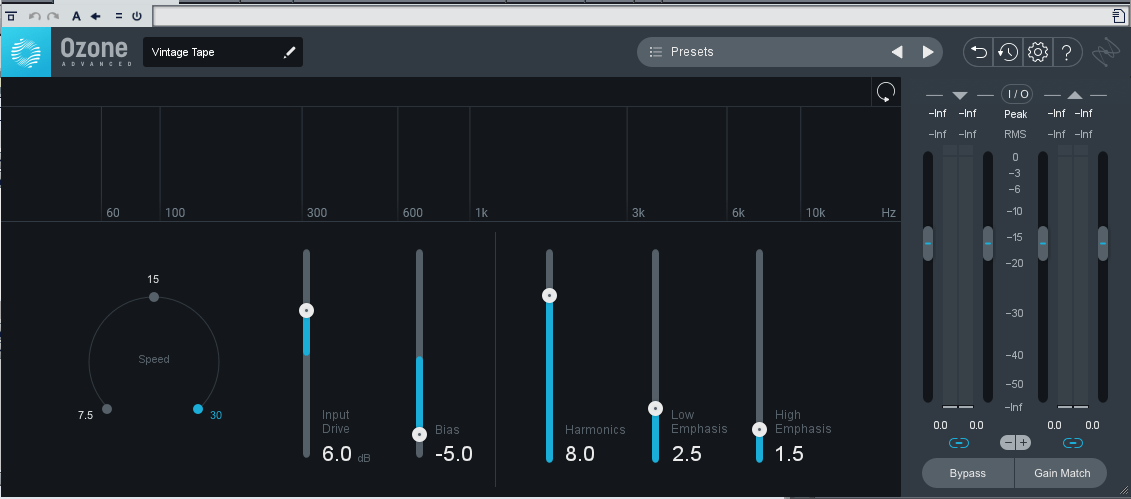

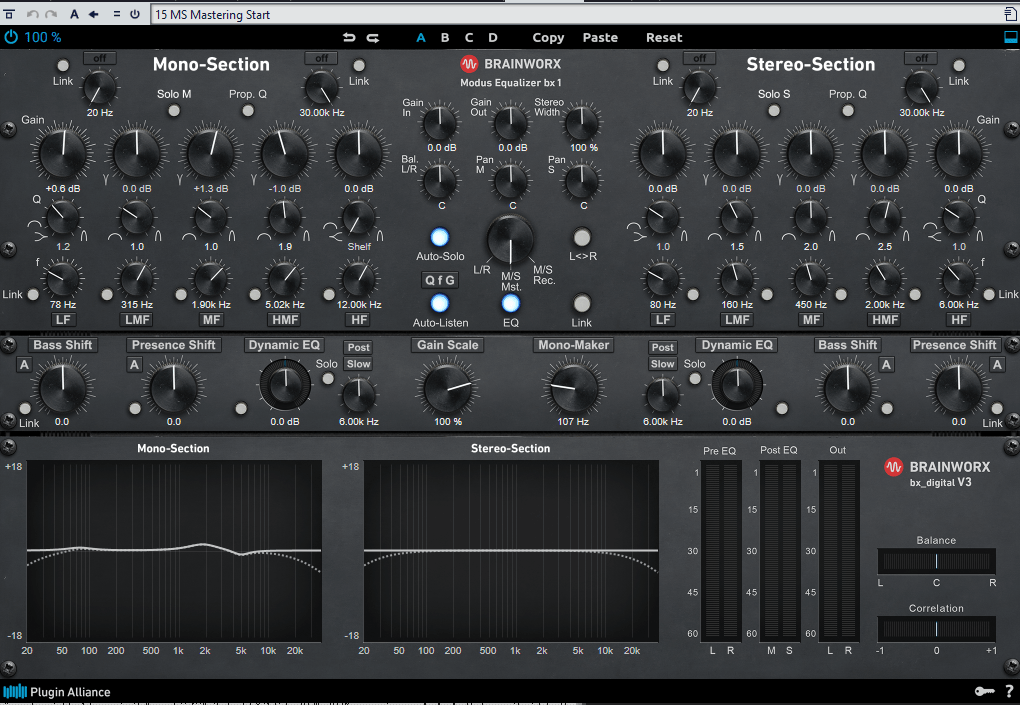


Image: Mastering processing chain in WaveLab 11 and metadata entry
Mastering by Obsidian mastering. The following steps were taken on analog gear:
- EL Fatso -> tape simulator with 1 dB compression and warmth function to add some subtle tape saturation.
- SPL PassEq passive tube EQ to add some warmth (180 Hz shelf 0.5 dB, 11KHz 2.6 dB cut (small Q), 1.5 KHz 0.7 dB cut).
- Maselec MLA-4 multiband compressor with max 2 dB compression on each channel for glue and control the hihat and lead vocal. This also improved the punch of the kick.
- HVA NEQ parametric mid side mastering EQ: 106 Hz 2 dB boost (Mid) to lift the bass, 362 Hz cut of 2 dB (Mid), and 1.5 KHz cut of 2 dB (Mid) to make vocal less sharp at screams.
- Michelangelo -> tube EQ, box tone.
- Kush Clariphonic -> parallel EQ for mid/high frequencies -> openend 3 KHz, and 34 KHz boost for top high and freshness after previous steps.
- Shadow Hills -> 0.5 dB optical compression and 1.0 dB discrete compression for glue and 3D depth.
In addition, Fabfilter Pro Q 3 has been applied for some EQ. E.g., 500 Hz small bell cut because of busy mix at this frequency range. No limiting applied and little compression to keep dynamics as much as possible.
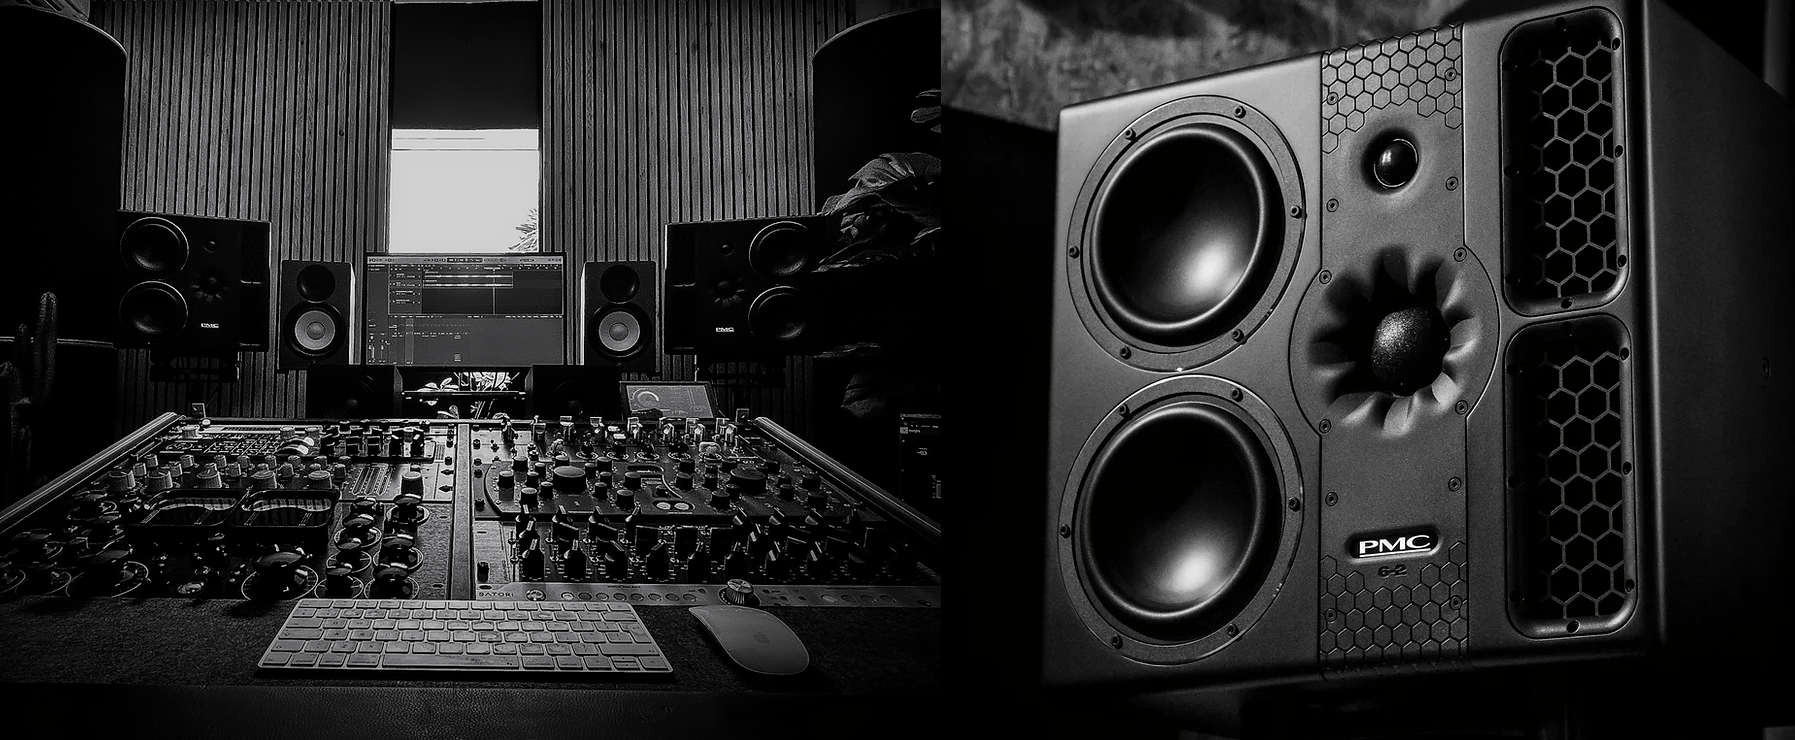
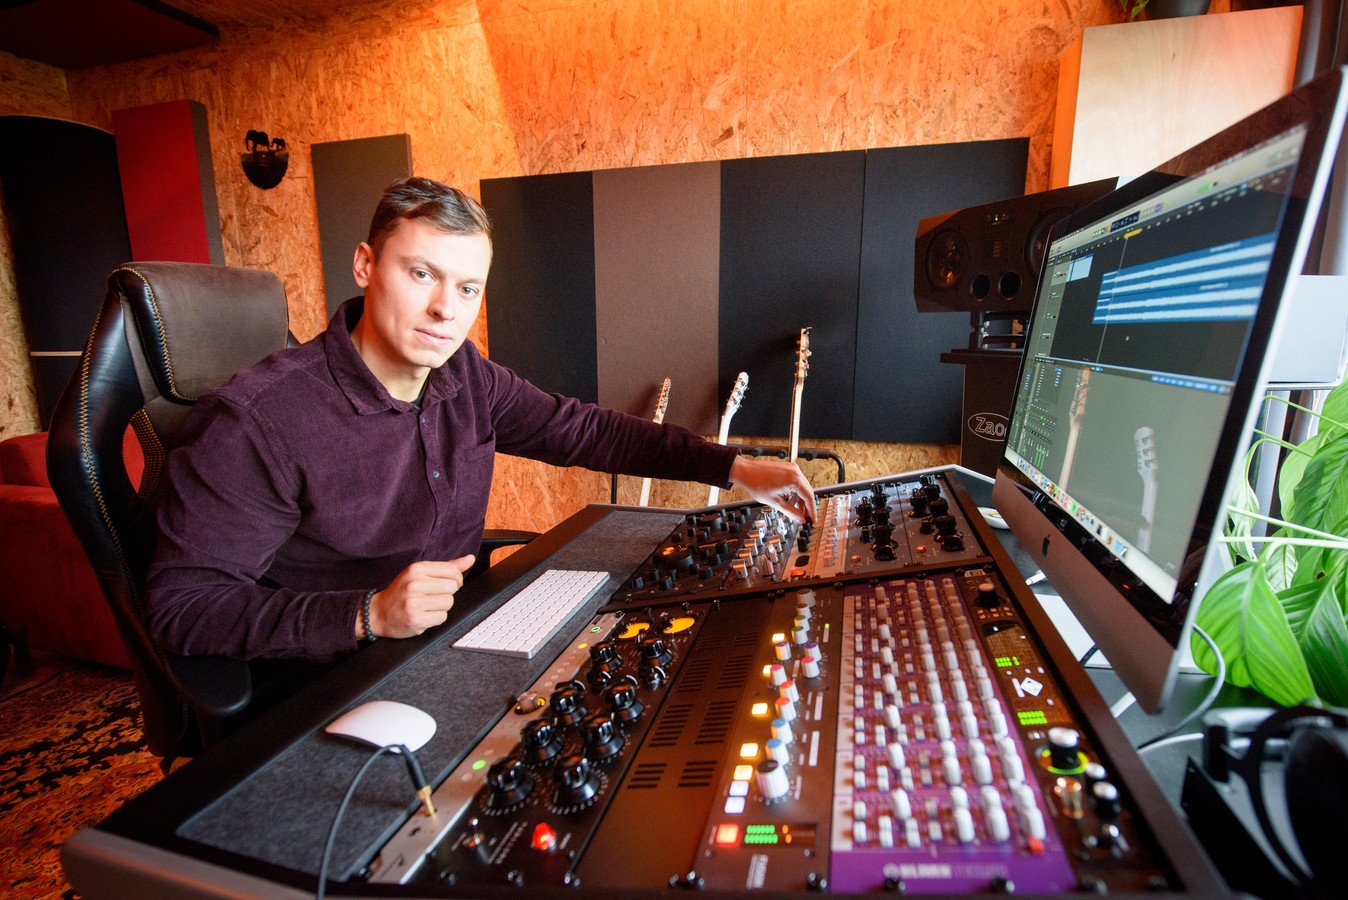
Image: Laurens van Oers (Obsidian Mastering).
Chord progression + Lyrics:
SoundCloud
Original song (vocals/piano: Daphne Reijnoudt)
Final mix
Final master (produced by Antoine van Kampen)
Final master (produced by Obsidian Mastering; Laurens van Oers)
Files
Multitrack available on request


