![]()

| Recent Comments |
| Categories |
| Archives |
| Tags |
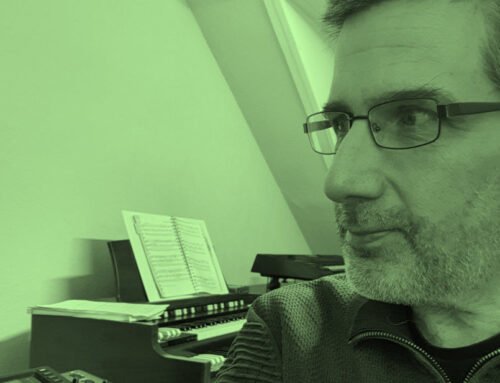
Mixclub ’22 – Anniversary (Thursday, 20 March, 2025)
MixClub ’22 is a group of (semi) professional mixing/mastering engineers who mix and master a multitrack every few months. We aim to produce this mix and master within a very limited time span as a challenge. See [here] for more information and [here] for the songs we mixed and mastered so far.
![]()
Past month we had the 10th session, an anniversary, for which we worked on the multitrack ‘Contact’ from Kat Wright who is a soul singer-songwriter. This multitrack was recorded live at Telefunken (Live at the Lab) and was kindly provided through the Cambridge MT multitrack library. All audio files have been engineered and recorded by TELEFUNKEN Elektroakustik and are presented for educational and demonstrational purposes only.

Kat Wright.
|
Listen here to my final result |
The 10th Session
In this mix session, with ten participants, we proceeded as usual. Everyone made a mix and master from the multitrack and provided a short description of the main challenge, the mixing and mastering process. Subsequently, each mix/master was evaluated by two other participants who provided feedback using a predefined template. Next, each participant made a final mix and master based on the feedback received. Finally, each participant ranked all mixes and masters. All material (initial and revised mixes/masters, notes, feedback) was provided to Holger Schwedt (Shamrock Studios, the Netherlands) and Wessel Oltheten (Spoor 14 studio, the Netherlands) who were so kind to provide an online mixing and mastering session respectively to provide additional feedback.
Holger Schwedt
Bass player Holger Schwedt (Shamrock Studios, the Netherlands) began his professional career at home in Leiden in an attic room with an 8-track recorder. Since 1982, he has been active as a mixer/producer. He has worked in various studios, including Wisseloord Studios, Bullet Sound Studios, ICP Studios, Fendal Sound Studios, Galaxy Studios, and Arnold Mühren’s studio. From the late 1990s until 2005, he worked as senior engineer and manager at John Ewbank’s Down Under Studios in Hilversum. In 2006, he started Shamrock Studios in Baarn. Due to its peaceful and leafy location, the complex is frequently used for international writing camps by publishing and recording companies such as Universal Music, Sony ATV, Cloud9, Topnotch, CTM, Strengholt, BMG, Talpa, 8Ball, and Warner. Behind the scenes, Schwedt has been involved in hundreds of chart-topping hits, including over 50 Radio538 Alarmschijven, Radio2 Talent songs, and 3FM Megahits. Twelve singles and thirteen albums have reached the #1 status.

Image 1. Holger Schwedt (Shamrock Studios).
Wessel Oltheten
Wessel Oltheten (Spoor 14 studio, the Netherlands) works as a mix and mastering engineer. He also teaches music production and audio engineering at the Utrecht University of the Arts , and is the author of Mixing with Impact, a book on mixing that’s available worldwide through Focal Press. Wessel has mixed and mastered music by DeWolff, Black Oak, Spinvis, Navarone, Pocket Knife Army, Kraak en Smaak, Amongster, Don Diablo, Moon Moon Moon, Tim Knol, Tangarine, I Am Oak, Awkward I, Anne Soldaat, Áslaug, Henny Vrienten, Audio Adam, and many more. Wessel has recorded e.g. the cinematic registration of Wagner’s Ring Des Nibelungen performed by the Nationale Reisopera, two albums by rock violinist David Garrett, and a single by Michael Jackson & Akon.

Image 2. Wessel Oltheten (Spoor 14 studio).
| Mixing and Mastering of the multitrack |
The main challenges
For me the biggest challenge was to get a good sounding vocal. The vocal recording sound quite dull (e.g., proximity effect) and occasionally lacked higher harmonics (which can be seen in SpectraLayers) . In addition, there was a lot of bleeding into the vocal microphone of the horn sections and the drums. Also other tracks suffered from bleeding.
Monitoring
Due to sub-optimal room acoustics of my studio, I combine different monitoring approaches. My monitoring comprises the Kali IN8 studio monitors, Avantone mix cubes, and the VSX headphone mixing system. I usually start out the gain staging, editing, and making a rough mix using the Kali IN-8’s. For the actual mixing and mastering I use the VSX. Final checks are done on the Kali IN8, Avantones, and some of my headphones, although I find the VSX quite reliable in terms of translation.
Mixing notes
- It is very difficult, if possible at all, to describe all nuances of the mixing and mastering process but I hope the description below gives an impression. However, realize that mentioning plugins does not give the full story; far from that.
- Mixing was done in Cubase Pro 14 (Steinberg). Mastering was done in WaveLab Pro 12 (Steinberg). For links of the various plugins that I used, see my studio software page.
- The vocal track was not of the best quality, i.e., lot of bleeding from other instruments, often higher harmonics missing (sounded sometimes muffled/dull; proximity effect?), and noise. I tried to improve with SpectraLayers, but this did not result in a significant improvement. Thus, I used the vocal track as provided.
- I edited the vocal, trumpet, saxophone, and baritone sax tracks (pitch and modulation, timing, and reduction of vocal sibilant consonants, breathing, and noise) with Melodyne. The only caveat with the current multitrack is that the vocal track also picked up a lot of horns. Therefore, edits made on the horn tracks did not transfer to the vocal track but this is hardly audible.
- The multitrack comes from a live recording which resulted in substantial bleeding of other instruments in the vocal microphone and, to a lesser extent, in the horn microphones. Therefore, I decided not to cut away the “empty” parts of each track (e.g., parts of the vocal track without singing) to ensure that the color of the sound does not change.
Multitrack and Cubase organization
I first organized the multitrack in Cubase using my default mixing template and using standard colors for each instruments for easy reference (Image 3). I used my standard routing setup, which is described in more detail [here] (Image 4).


Image 3. Cubase project window and mix console.

Image 4. Routing used for Contact (not all tracks are shown). Use of multiple layers of mix busses gives more flexibility (e.g., processing, automation). The final mix busses (purple) are controlled by the Softube console fader. Effects channels (e.g., reverb) are not shown.
Gain staging
I generally follow the same procedure for gain staging. In Cubase, I configured the peak meter to indicate -18dBFS (Image 5), which is the starting level (set by the channel gain) that I use for all audio tracks, with faders set to 0dB. This prevents me from overloading my mix busses but still gives a descent level on the stereo bus (generally, between -23 and -14 LUFS).

Image 5. Cubase peak meter configuration.
Stereo image
- Vocals, bass guitar (center); all corresponding effects to center
- Drum (center), with snare and hihat slightly panned to left, and floor tom to right. All corresponding effects to center
- Guitar (L70) with guitar delay panned to right (R65)
- Hammond (Right R70); Reverb panned to right (R56)
- Wurlitzer (center); Reverb panned to right (R56)
- Horns mixbus (R24); Trumpet (R46), Tenor (L46), Trumpet (center). In this way the trumpet and hammond are on the right channel (no masking) while at the same time the trumpet (high) complements the high guitar (right).
Vocals
The vocal posed the biggest challenge to me and, therefore, I describe the processing on the vocals in some more detail. Not only due to the bleeding but also because it sometimes sounded very dull (in SpectraLayers you can clearly see that the higher harmonics are much lower in level in such cases). A combination of (dynamic) equalization, compression, and parallel processing improved the track but it is really unfortunate that the vocal recording as not much better because she has a nice voice.
- Editing
- I did some pitch correction in Melodyne Studio (Image 6), which has ARA integration with Cubase. In addition, in Melodyne, I corrected some of the pitch modulation which was sometime too strong to my ears, reduced part of the sibilance manually, and reduced some noise. Note, before editing with Melodyne, I duplicated and bounced the vocal track to ensure I have an un-edited backup copy.
- The vocal part following the horn solo is louder. Therefore, I copied this part to a separate track such that I could use a different threshold for my compressor. In addition, I did some manual gain adjustments in this clip by drawing in a gain curve in the wave.
- Inserts (Image 7)
- EQ and compression (SSL Native Channel Strip 2)
- High pass 100Hz, 3dB@12kHz, 6dB@2.2kHz, -3dB@420Hz
- RMS, Threshold -1dB, ratio 1.6, release 450ms.
- Compression (Softube VCA compressor).
- Threshold -16, Attack 660ms, release 760ms, ratio 4, makeup gain 2.4
- EQ (FabFilter Pro-Q 4)
- High pass filter and three dynamic bands to control the mids and highs, and two notches to filter out frequencies that made the vocals muffled.
- EQ (SoundToys Sie-Q)
- Low -3dB, mid 6dB@3.5kHz, high 4dB, drive 4dB;
- EQ (UAD PulTec EQP-1A)
- Compression (SSL Native Channel Strip 2 and Softube VCA compressor).
- De-essing (Weiss Deess).
- Notes: using 4 EQ’s seems kind of ridiculous but this worked for me. I tried different (combinations) of EQ’s but this is what I ended up with. The two compressors basically controlled the dynamics with a few dB’s. Using the Bertom EQ Curve Analyzer we can see the resulting EQ curve in Image 8, which has a boost of about 20dB at 3.8kHz.
- EQ and compression (SSL Native Channel Strip 2)
- Effects channels and parallel processing (Image 9).
- Reverb 1 (VallhallaVintageVerb, followed by FabFilter Pro-Q 4). Main reverb for the vocal.
- Delay +Reverb 2 (FabFilter Timeless 3, FabFilter Pro-R 2 and FabFilter Pro-Q 4). This delay/reverb is only used for the bridge and the end of the song.
- Detune (SoundToys’ MicroShift, followed by FabFilter Pro-Q 4); In the end I didn’t use this one.
- Saturation (SoundToys Decapitator, SoftTube VCA compressor, FabFilter Pro-Q 4, Weiss Deess)
- Parallel compression (UAD 1176LN Rev E, FabFilter Pro-Q 4, Weiss Deess)
- Notes: the saturation provides a distorted vocal to give it some more grit/character. It was compressed to keep the dynamics more firmly under control. The parallel compression gave the vocal more body.
- Automation (Image 10)
- Automation of the volume level and send level for the Delay+Reverb 2.

Image 6. Melodyne Studio session with the vocal track.


Image 7. Processing on the vocal track. FabFilter Pro Q4, Softube VCA compressor, SoundToys Sie-Q and the UAD Pultec. EQP-1A and the Weiss deess.

Image 8. Resulting vocal EQ curve taking into account the FabFilter Pro-Q4 on the final mixbus. This curve does not reflect changes made by the dynamic EQ’s that were used. Curve obtained by Bertom EQ Curve Analyzer.


Image 9. Effects channels, effects and parallel processing of the vocal track. ValhallaVintageVerb, Timeless 3, Pro-R2, Decapitator, VCA compressor, UAD 1176, and the Weiss Deess.

Image 10. Vocal automation: volume and send level for second reverb. In the last vocal clip the gain curve is visible. The blue clip is bleed of horns and drums in the vocal microphone during the solo of the horn section.
Drums
- Inverted the phase of few tracks. Decided not to use the Overhead (OH) mono track but only used the OH stereo.
- Did not use the Room microphone, this picked up all other instruments too much and dialing it in a little already filled up the frequency spectrum too much.
- I created a separate copy for the Kick In track for the bridge part (~2:20), because the kick sounded to dull in that part. On this track I inserted the SoundToys Decapitator to add some higher frequency harmonics, and the UAD 1176 Rev A compressor, and FabFilter Pro-Q4. For this part I disabled the parallel compression through automation.
- I also replaced one of the snare hits that sounded to dull at about 1m38s, and increased the level of a few other hits.
- Most work was done on the kick, for which I used the following Insert plugins:
- Compression (SSL Native Channel Strip 2) to control the dynamics of various tracks and drum bus (only 2-3 dB), and UAD 1176LN Rev E compressor) to get a tighter kick.
- EQ (SSL Native Channel Strip 2, FabFilter’s Pro-Q4, Tone Project’s Michelangelo) (less low-end rumble). The resulting EQ curve is shown in Image 11, which has a 3.5 cut at 77Hz, 4dB boost at 3.5 kHz (click), and a -11dB cut at 1.4kHz.
- Effect channels
- Parallel compression (UAD Empircal Labs Distressor).
- Snare plate reverb (UAD Lexicon 224 Digital Reverb).
- Drum reverb (UAD Lexicon 224 Digital Reverb; Image 12).
- Drum sub mixbus: saturation (UAD Studer A800 tape recorder; Image 12).
- Automation: volume automation on the snare to increase the level of the side stick.

Image 11. Resulting EQ curve for the kick drum. Curve obtained by Bertom EQ Curve Analyzer.


Image 12. Drum reverb (UAD Lexicon 224 Digital Reverb) and drum bus saturation (UAD Studer A800 tape recorder).
Bass
- I only used the amp’ed bass track and not the DI recording. The bass was already quite good thus only applied a slight compression and EQ
- Inserts
- EQ (SSL Native Channel Strip 2, FabFilter Pro-Q4); Also in this case I could have sufficed with the SSL only (i.e., the 7dB SSL boost at 620Hz is partially undone by the Pro-Q4 cut). The high-pass filter of the Pro-Q4 makes the slope a little steeper compared to the high-pass filter of the SSL alone. The resulting EQ curve is shown in Image 13. Although it seems there is a high-shelf attenuation, this is actually caused by the fact that the makeup gain of the compressors were not properly set. As shown by the DDMF Plugin Doctor with the SSL plugin, the high frequencies are at 0dB and there is a boost of the low and mid frequencies (Image 14).
- Compression (SSL Native Channel Strip 2, FabFilter Pro C-2) to keep dynamics under control and the UAD Emperical Labs Distressor to give little bit more groove.
- Bass sub mixbus: saturation (UAD Studer A800 tape recorder)
- Automation: automation to slightly increase level of bass riff at 1m37s.

Image 13. Resulting EQ curve for bass guitar. Curve obtained by Bertom EQ Curve Analyzer.

Image 14. EQ curve of the SSL channel strip using plugin Doctor.
Guitar
- I used the M80 track and discarded the Proto 647 track. Both tracks are identical but I liked the sound of the M80 microphone better.
- There is already some reverb/delay on the guitar recording.
- Inserts
- EQ (SSL Native Channel Strip 2)
- Compression (SSL Native Channel Strip 2; fast attack) and two Softube VCA Compressors. Each only a few dB to keep a very even level.
- Effects channels
- Chorus (UAD Studio D Chorus); hardly audible but gives a fatter sound.
- Delay (FabFilter Timeless 3). The guitar is panned to the left channel, the stereo delay to the right. This nicely adds dimension to the guitar without getting muddiness.
- Guitar sub mixbus: saturation (UAD Studer A800 tape recorder) and compressor (Steinberg) controlled by the snare via the side chain to ensure that (in the beginning) the snare cuts through the guitar.
- Automation:
- Volume (Image 15).
- Delay (increased during bridge)

Image 15. Volume automation of the guitar.
Keys
- There is already some reverb (or room ambiance) on the Hammond tracks
- Inserts:
- EQ (SSL Native Channel Strip 2)
- Compressor (only for Wurlitzer) (SSL Native Channel Strip 2, Softube VCA compressor)
- Effects channels
- Reverb (Waves H-Reverb); I know, I shouldn’t use Waves anymore, but this was still in my template. Sorry. See [here].
- Keys sub mixbus: saturation (UAD Studer A800 tape recorder)
- Automation: only volume (Image 16).

Image 16. Automation on the hammond and the wurlitzer.
Horns
- Editing
- I corrected the timing and pitch of very few notes in Melodyne to get it even more aligned.
- Inserts on each of the individual tracks
- EQ (FabFilter Pro-Q4)
- Compression (FabFilter Pro-C2, UAD 1176LN Rev E)
- Effects channels
- Reverb (UAD Lexicon 224 Digital Reverb)
- Delay (FabFilter Timeless 3)
- Horns sub mixbus
- Saturation (UAD Studer A800 tape recorder, Soundtoys Depacitator)
- EQ (SSL Channel Strip 2; FabFilter Pro-Q4)
- Compression (SSL Channel Strip 2)
- Automation (Image 17)
- Volume
- Delay send level. To push the trumpets back in the mix after the horn solos
- Frequency. To enable a high-shelf that attenuates higher frequencies to push the horns back in the mix.

Image 17. Automation on the horn section.
Mix busses
For the vocals, drums, bass, guitar, keys and horns, I use separate end mix-busses (purple in Image 4; see routing [here]). On each bus I have saturation (FabFilter Saturn 2; Image 18), the SSL channel strip 2, and the SSL Bus Compressor 2 that, by default, or turned off but otherwise gives 1 – 4 dB compression. For this song, I used the following configuration:
- Vocal: compression (FabFilter Pro Q4 (reduction in mid, boost in high) and SSL Bus Compressor 2)
- Drum: little saturation (FabFilter Saturn 2 Clean Tape) and compression (SSL Bus Compressor 2).
- Bass: little saturation (Saturn 2 Clean Tube) and compression (SSL Bus Compressor 2).
- Guitar: little saturation (Saturn 2) and compression (SSL Bus Compressor 2).
- Keys: little saturation (Saturn 2 Warm Tube) and compression (SSL Bus Compressor 2).
- Horns: little saturation (Saturn 2 Clean Tube) and compression (SSL Bus Compressor 2).
- AUTO: to automate the volume of the overall mix (Image 19).

Image 18. Saturation (FabFilter Saturn) on the guitar bus.

Image 19. Automation on the final (AUTO) mix bus to change the level of the full mix.
Mastering notes
Mastering was done in WaveLab Pro 12 (Steinberg). For the various plugins that I used, see my studio software page.

Image 20. Mastering session in WaveLab Pro 12.
Overall mastering workflow
- Created audio montage for song.
- Load stereo audio file in montage (44.1kHz/32bit fp) into WaveLab .
- Let the song start at 200ms
- No fade in at the beginning; a sigmoid fade out on the end
- Set top loudness range to -16 LUFS to have a reasonable input level for the audio processing
- Set CD markers (to set song name)
- Define CD Text; Entries are automatically used by my meta-data template (e.g., ID3 v1/v2). Added additional metadata, and artwork (only mp3).
- Audio processing (see below)
- Render to 32bit floating point, 44.1 kHz (this version has the audio processing locked in).
- From 32bfp render to 24bit 44.1kHz (dithered wav)
- Checked rendered audio and metadata
Processing chain
Saturation (Ozone 9 Vintage Tape; iZotope).

Image 21. Adding some saturation using the Ozone 9 Vintage Tape plugin.
EQ (Pro-Q3; FabFilter). The saturation resulted in a slight increase in the lower frequencies, which I compensated for with this EQ.

Image 22. 1 dB reduction of the lower frequencies with FabFilter Pro-Q3.
Compression (Weiss DS1-MK3; Softube).

Image 23. Glue compression with the Weiss DS1-MK3.
Imaging (Imager; Steinberg).

Image 24. Slightly increasing the width of the mix using a multiband imager.
Limiting (TDR Limiter 6GE; Tokyo Dawn Records). Peak limiting + clipping. The final output threshold was also set to -1dBFS (PCM) as an additional safeguard.

Image 25. The final step: limiting with the TDR Limiter.
Metadata.

Image 26. Adding metadata in WaveLab.
Rendering.
- 32 bit floating point 44.1kHz wav (processed audio; not dithered; includes all metadata).
- 24 bit 44.1kHz wav file (processed audio. Dithered (Lin Dither, Steinberg). All metadata.
- 320 kbps mp3 file (processed audio. No dithering). All metadata and album art.
Changes after feedback
Comparing my mix/master to all other submissions, I may have made the mix too light (too transparent). Even a bit harsh maybe. Most changes that I made are an attempt to solve this issue. In addition, I addressed several issues based on the feedback from my peers. I also made the new master less loud.
Mix
- Increased the ‘low’ Hammond with 1.5dB
- Made the ‘tone’ of Decapitator on the horns but a little bit darker
- Reduced the cut at 350Hz in the bass with 1.5dB
- Slightly reduced the highs and drive on the Sie-Q EQ (SoundToys)
In addition, I made the following changes:
- Removed the first part of the vocal track that didn’t contain vocals but mainly bleed from horns and drums, and which made the horns sound little strange and unbalanced.
- Slightly (1.5) reduced the level of the side stick in the beginning of the song.
- Increased the reverb on the horns with 1dB
- Increase the level of the toms in the intro with 3dB
- Increased level of drums with +1dB
- Increased level of bass with +1dB
Master
- Removed the last tick of the count-in, which was still audible in the master.
- Update of mastering processing chain: I used almost the same processing chain but changed the settings:
Distortion/Harmonics (Ozone 9 Vintage Tape; iZotope). Add some harmonics. Changed to settings to get bit more processing of lows/mid and reduced the highs.

Image 27. Adding some saturation using the Ozone 9 Vintage Tape plugin.
EQ (Fabfilter Pro-Q3). Small reduction in the lows.

Image 28. Slight reduction of the lower frequencies.
Compression (Weiss DS1-MKIII). Slight gluing compression; (max 3dB).

Image 29. Glue compression.
EQ (Weiss EQ). Slight reduction of bass. Slight increase of mids.

Image 30. Slight reduction of lower mid-frequencies and boosting some of the upper mids.
Steinberg Imager

Image 31. Slight widening of stereo field.
Limiting (TDR Limiter 6GE, Tokyo Dawn Records). The final threshold was also set to -1dBFS (PCM) as an additional safeguard.

Image 32. Clipping and limiting.
| The results |
Loudness and peak-levels
Mix 1 and Master 1 are before feedback. Mix 2 and Master 2 are after feedback.

My Mixes and masters
Unmixed multitrack
First version of Mix before feedback
First version of Master before feedback
Final Mix
Final Master (this is the one to listen to)
Original song (not produced by me)
Master of Alexander Tripiana (best ranked)
| Feedback and evaluation of all mixes and masters |
Feedback (Dutch)
Scores

Image 33. The scores (10=best; 1 = less good) for the mixes and masters. Each of the ten participants received eight scores (2 participants didn’t participate in the scoring) resulting in a ranking. Each row shows the scores that each participant received from the other participants. Each participant was allowed to give a 10 to his own mix. The total score for the mixes and masters are shown (theoretical range 0 – 80). This was translated to a final grade by dividing the score: grade = score/80. The ‘Difference’ shows the grade difference between the mix and master. A negative value indicates that the mix sounded better than the master. Alexander Tripiana was ranked best, while I was ranked second best. However, most of the mixes and masters were quite good but just sounded different. You can find all mixes, masters, and feedback in the Dropbox folder (see below).
Score analysis

Image 34. The boxplots show the 16 scores (dots) for the mix and master of each participant. Line denotes median value. Box denotes 25th and 75th percentiles, whiskers show the minimum and maximum value. Although some participants clearly received a higher score than others, it also shows the large variance in scoring although for some participants (HN, PB) there was more consensus. The large variance might be caused by a combination of factors, e.g., personal preference for the sound of a mix/master, studio monitoring used for auditing the mixes/masters).

Image 35. Each line shows the scores received for the mixes (blue) and masters (red) of one participant. The scores of the winner (AT) is emphasized. Again, the high variance between the scores is apparent and even the winner received some lower scores.

Image 36. Principal Component Analysis (PCA) showing the relative similarity of scores given by each participant for the mixes (blue) and masters (red). Some participants (e.g., TS and AvK) gave similar scores to the mixes and masters while other participants (e.g., HN and PB) gave quite different scores to the mixes and masters.

Image 37. Principal Component Analysis (PCA) showing the relative similarities between the participants with respect to the scores received for the mixes and masters. For example, TS and PB received similar scores while JPB and BH received very different scores.

Image 38. There is no obvious correlation between the score for the master and the integrated loudness (LUFS) of the song. Thus, we were not misled by volume.
| Online mixing and mastering session |
Mixing session with Holger Schwedt
We had a fantastic three-hour online mixing session with Holger Schwedt. Holger used ListenTo from AudioMovers for use to receive a high-quality (24bit) audio stream. We went through all stages of the mixing process, i.e., from organizing the project, to gain staging, mixing, and making a rough master (for which we used the master of Alexander Tripiana as a reference. For me, there were few take home messages. In random order: (i) don’t use to much EQ. I obviously used too much EQ on my vocals as was directly obvious to Holger (I tried to fix the unfixable; sometimes you have to live with the sub-optimal quality of an audio track). (ii) it is not wrong to use EQ on the stereo bus as a replacement of EQ’s on the individual tracks. (iii) don’t cut away the lows (or even increase them) at the initial stages of the mix. In case of masking or other low-end problems you can still change this at a later stage. (iv) dynamics (compressing) is more important than EQ. (v) less is more. (vi) try to have to vocals as soft as possible in the mix while ensuring (with volume automation) that word stays intelligible. If a vocal is too loud, this will go at the expense of the drum/bass (power). (vii) The hi-hat track is not very important since it will also be picked-up by the OH’s. Only use as much as necessary. (viii) The OH microphones represent the whole drum kit not only the cymbals. Nevertheless, start with the kick/snare and dial in the OH’s later. (ix) Cut away the bleeding parts between the vocals because these can mess-up the sound.
Also gained some new knowledge. (i) This multitrack contains a mono and stereo overhead. The mono overhead seems to be something from the past, but can be added with severe limiting. (ii) presets of EQ plugins are generally of little use while presets for compressors and reverbs are much more useful (as a starting point). The start-up presets for compression and reverbs are often suitable for vocals.
At the end of the session Holger quickly evaluated several of our masters and compared them to his result and to a recent song from Spotify. One obvious difference was the high loudness of his result and the Spotify song (about -8 LUFS) compared to most of our masters.
Finally, I got to know another nice plugin from Black Salt Audio: the Silencer for eliminating cymbal bleed from the kick, snare, and toms. It works much better as a traditional gate. I directly added it to my arsenal.


Mastering session with Wessel Oltheten
We wrapped up our anniversary with an outstanding two-hour mastering session led by Wessel Oltheten—once again via Zoom and streamed using ListenTo from AudioMovers. Wessel uses Cubase for audio processing and WaveLab for montage, such as assembling CDs. During the session, he began by evaluating short fragments of each mix—the starting point for mastering—while providing us with valuable feedback. Thanks to his extensive experience in mixing and mastering, as well as the precision of his Grimm LS1 monitoring system and carefully tuned studio acoustics, his insights were incredibly helpful. This feedback will undoubtedly enhance our future mixes.
Wessel explained that he uses a mastering template in Cubase, where a dedicated track plays the mix with a direct output at -18 dB to outboard gear for processing. Additionally, a pre-fader send routes the signal to an audio track named “ORG” (original), where the mix is played back at a fixed level of -14 LUFS (the standard level for Spotify) by applying a +4 dB gain boost. This ensures that the original mix is always heard at a consistent -14 LUFS level.
One objective is to determine whether the master truly improves upon the mix—without being misled by loudness alone. This method forces (or rather enables) mastering in a way that maintains a perceived loudness of -14 LUFS ‘standard’. As a result, it minimizes excessive limiting and preserves dynamics. Ultimately, Wessel typically lands between -12 and -14 LUFS for the final master.
This approach stands in contrast to Holger’s method (and perhaps that of many others) who argue against targeting -14 LUFS. Finally, Wessel’s template includes a “MASTER_REC” audio track, which records the processed audio for the final master.
The feedback on my mix was the guitar that seemed to be disconnected from the drums because I panned it too much to the left. In addition, the vocals (and the horns) sounded to nasal (too much 2-4kHz?). Something similar was noticed by Holger and likely due to the too many EQ’s that I used.
Other general remarks made on various mixes included (i) Wessel prefers to have a mix with too much low end instead of the other way around since this can be more easily fixed, (ii) make sure that the transients (e.g., stick attack on cymbals) don’t become too prominent, (iii) don’t master with your eyes but with your ears, (iv) do not only focus on problems but also on the aspects you like.
Once we evaluated all mixes, Wessel mastered the mix of Alexander Tripiana and explained the processing he did and why.
Also during this session, I got to know another nice plugin from Tone Projects: Kelving Tone Shaper to add saturation. I directly added it to my arsenal because I am not really satisfied with Vintage Tape from iZotope that I generally use for mastering and want to reserve Saturn (FabFilter) for mixing.


| Surprise! |
At the end of the mastering session, the participants encouraged me to visit our MixClub’22 Facebook page, where a wonderful surprise awaited me. I sincerely thank everyone for this thoughtful gesture—it truly is appreciated! I’ll be sure to share how this contributes to my studio setup.
Of course, MixClub wouldn’t be possible without the dedication of everyone who has contributed so far—spending time on mixing, mastering, and, most importantly, providing valuable feedback. This 10th session was especially memorable thanks to Holger and Wessel, and I look forward to many more sessions and songs to come. And who knows—perhaps we’ll once again have insights from real professionals!

| Documents |
Description of mix and master
Feedback on first version of mix and master
Final Scores
Dropbox
Here you can find all mixes, masters, notes and feedback (Dutch).


